FPV 我的小四軸 第一次戶外手動加翻滾練習 拍拍 一群狗


H2 KK20 金剛飛塔+CADD 1080P 60Fps 錄影 小四軸 DIY 組裝
H2 KK20 金剛飛塔+CADD 1080P 60Fps 錄影 小四軸 DIY 組裝
室內飛安全可以拍一些近身影片運鏡,室外還可以小穿越一下...


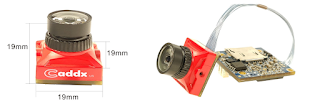
室內飛安全可以拍一些近身影片運鏡,室外還可以小穿越一下...

電池 2S 450mA 建議4-8顆玩起來才剛剛好爽.

畫質不錯 1080p 可以跑到60張錄影
以上 上沒屋頂 搜尋 史巴克 賣家,俏悄話問下.
DIY mega256 Open TX 後修改4合1高頻頭 對應 Frsky XM+ D16 mode RX
DIY mega256 Open TX 後修改4合1高頻頭 對應 Frsky XM+ D16 mode RX
測試 Frsky xm+ 可以對頻 正常.

4合1高頻頭


軟體資訊 網站
Manually Uploading HEX files and setting Fuses on ATmega328
fuses 位置 重要...一定要填對寫入

另一上傳軟件 PORGISP2.0 因ARDUINO 上傳我試都不行,所以改用USBISP 專用燒入軟體一次成功. 請上網找 POGISP 2.0 網上很多下載資源.

上傳/更改 Fuses 軟體工具....好用
usbasp tools

照此網頁步驟完成fuses 更改與軟體上傳
原始 code
-config.h 要去設定 尋找 frsky xm+ 接收頻率.
若一開始就對到當然不用去找.
/** CC2500 Fine Frequency Tuning **/
//For optimal performance the CC2500 RF module used by the FrSkyD, FrSkyV, FrSkyX, SFHSS, CORONA and Hitec protocols needs to be tuned for each protocol.
//Initial tuning should be done via the radio menu with a genuine FrSky/Futaba/CORONA/Hitec receiver.
//Once a good tuning value is found it can be set here and will override the radio's 'option' setting for all existing and new models which use that protocol.
//For more information: https://github.com/pascallanger/DIY-Multiprotocol-TX-Module/tree/master/docs/Frequency_Tuning.md
//Uncomment the lines below (remove the "//") and set an appropriate value (replace the "0") to enable. Valid range is -127 to +127.
//#define FORCE_FRSKYD_TUNING 0
//#define FORCE_FRSKYV_TUNING 0
//#define FORCE_FRSKYX_TUNING 0
//#define FORCE_SFHSS_TUNING 0
//#define FORCE_CORONA_TUNING 0
//#define FORCE_HITEC_TUNING 0
---------------------------------------------------------------------------------------------------------------------
NBR_BANKS 裡面 option 就是 頻率微調的值可以從 -127~+127做設定慢慢去找到上下值
後 ( 最大+最小) / 2 就是比較好的值....
我是用 20為一個單位 設了好幾個開關再一個個對頻找出上下值. 最後填入適當的值做為標準
/* 12 */ {PROTO_FRSKYX, EU_16, 0 , P_HIGH , NO_AUTOBIND , 40 }, // option=fine freq tuning
40 是原始內建 ....我的 frsky xm+ 就是對不到...
例:
/* 1 */ {PROTO_FRSKYX, EU_16, 0 , P_HIGH , NO_AUTOBIND , 0 },
/* 2 */ {PROTO_FRSKYX, EU_16, 0 , P_HIGH , NO_AUTOBIND , 20 },
/* 3 */ {PROTO_FRSKYX, EU_16, 0 , P_HIGH , NO_AUTOBIND , 40 },
/* 3*/ {PROTO_FRSKYX, EU_16, 0 , P_HIGH , NO_AUTOBIND , 60 },
.
.
.
-----------------------------------------------------------------------------------------------------------------------
因為 我買的是atmega328 容量有限所以 要去減肥....沒用的就在前面加 "//"
直到 arduino 編譯正常就好了..
/****************/
/*** RF CHIPS ***/
/****************/
//There are 4 RF components supported. If one of them is not installed you must comment it using "//".
//If a chip is not installed all associated protocols are automatically disabled.
//4-in-1 modules have all RF chips installed
//!!!If a RF chip is present it MUST be marked as installed!!! or weird things will happen you have been warned.
//#define A7105_INSTALLED
#define CYRF6936_INSTALLED
#define CC2500_INSTALLED
#define NRF24L01_INSTALLED
/****************************/
/*** PROTOCOLS TO INCLUDE ***/
/****************************/
//In this section select the protocols you want to be accessible when using the module.
//All the protocols will not fit in the Atmega328p module so you need to pick and choose.
//Comment the protocols you are not using with "//" to save Flash space.
//The protocols below need an A7105 to be installed
//#define AFHDS2A_A7105_INO
//#define FLYSKY_A7105_INO
//#define HUBSAN_A7105_INO
//#define BUGS_A7105_INO
//The protocols below need a CYRF6936 to be installed
#define DEVO_CYRF6936_INO
#define DSM_CYRF6936_INO
#define J6PRO_CYRF6936_INO
#define WFLY_CYRF6936_INO
#define WK2x01_CYRF6936_INO
//The protocols below need a CC2500 to be installed
#define CORONA_CC2500_INO
#define FRSKYD_CC2500_INO
#define FRSKYV_CC2500_INO
#define FRSKYX_CC2500_INO
#define HITEC_CC2500_INO
#define SFHSS_CC2500_INO
//The protocols below need a NRF24L01 to be installed
//#define ASSAN_NRF24L01_INO
#define BAYANG_NRF24L01_INO
#define CABELL_NRF24L01_INO
#define CFLIE_NRF24L01_INO
#define CG023_NRF24L01_INO
#define CX10_NRF24L01_INO // Include Q2X2 protocol
#define DM002_NRF24L01_INO
#define ESKY_NRF24L01_INO
#define ESKY150_NRF24L01_INO
//#define FQ777_NRF24L01_INO
#define FY326_NRF24L01_INO
#define GW008_NRF24L01_INO
//#define HISKY_NRF24L01_INO
//#define HONTAI_NRF24L01_INO
#define H8_3D_NRF24L01_INO
#define KN_NRF24L01_INO
#define MJXQ_NRF24L01_INO
#define MT99XX_NRF24L01_INO
#define Q303_NRF24L01_INO
#define SHENQI_NRF24L01_INO
#define SLT_NRF24L01_INO
#define SYMAX_NRF24L01_INO
#define V2X2_NRF24L01_INO
#define YD717_NRF24L01_INO
-----------------------------------------------------------------------------------------------------------
這裡可以自己去設定你有用的協議 開關位置照自己意思放...
剛剛找出正確的值後填入 frskyx 的 option位置裡
例:
我的是 -40
/* 11 */ {PROTO_FRSKYX, CH_16 , 0 , P_HIGH , NO_AUTOBIND , -40 }
/** Number of PPM Channels **/
// The line below is used to set the minimum number of channels which the module should receive to consider a PPM frame valid.
// The default value is 4 to receive at least AETR for flying models but you could also connect the PPM from a car radio which has only 3 channels by changing this number to 3.
#define MIN_PPM_CHANNELS 4
// The line below is used to set the maximum number of channels which the module should work with. Any channels received above this number are discarded.
// The default value is 16 to receive all possible channels but you might want to filter some "bad" channels from the PPM frame like the ones above 6 on the Walkera PL0811.
#define MAX_PPM_CHANNELS 16
/** Rotary Switch Protocol Selector Settings **/
//The table below indicates which protocol to run when a specific position on the rotary switch has been selected.
//All fields and values are explained below. Everything is configurable from here like in the Serial mode.
//Tip: You can associate multiple times the same protocol to different rotary switch positions to take advantage of the model match based on RX_Num
//A system of banks enable the access to more protocols than positions on the rotary switch. Banks can be selected by placing the rotary switch on position 15, power up the module and
// short press the bind button multiple times until you reach the desired one. The bank number currently selected is indicated by the number of LED flash.
// Full procedure is located here: https://github.com/pascallanger/DIY-Multiprotocol-TX-Module/blob/master/Protocols_Details.md#protocol-selection-in-ppm-mode
//The parameter below indicates the number of desired banks between 1 and 5. Default is 5.
#define NBR_BANKS 5
const PPM_Parameters PPM_prot[14*NBR_BANKS]= {
#if NBR_BANKS > 0
//****************************** BANK 1 ******************************
// Switch Protocol Sub protocol RX_Num Power Auto Bind Option
/* 1 */ {PROTO_FLYSKY, Flysky , 0 , P_HIGH , NO_AUTOBIND , 0 },
/* 2 */ {PROTO_AFHDS2A, PWM_IBUS , 0 , P_HIGH , NO_AUTOBIND , 0 }, // RX number 0
/* 3 */ {PROTO_AFHDS2A, PWM_IBUS , 1 , P_HIGH , NO_AUTOBIND , 0 }, // RX number 1
/* 4 */ {PROTO_AFHDS2A, PWM_IBUS , 2 , P_HIGH , NO_AUTOBIND , 0 }, // RX number 2
/* 5 */ {PROTO_AFHDS2A, PWM_IBUS , 3 , P_HIGH , NO_AUTOBIND , 0 }, // RX number 3
/* 6 */ {PROTO_AFHDS2A, PWM_IBUS , 2 , P_HIGH , NO_AUTOBIND , 0 }, // RX number 4
/* 7 */ {PROTO_AFHDS2A, PWM_IBUS , 3 , P_HIGH , NO_AUTOBIND , 0 }, // RX number 5
/* 8 */ {PROTO_SFHSS, H107 , 0 , P_HIGH , NO_AUTOBIND , 0 },
/* 9 */ {PROTO_FRSKYV, 0 , 0 , P_HIGH , NO_AUTOBIND , 40 }, // option=fine freq tuning
/* 10 */ {PROTO_FRSKYD, 0 , 0 , P_HIGH , NO_AUTOBIND , 40 }, // option=fine freq tuning
/* 11 */ {PROTO_FRSKYX, CH_16 , 0 , P_HIGH , NO_AUTOBIND , -40 }, // option=fine freq tuning
/* 12 */ {PROTO_FRSKYX, EU_16 , 0 , P_HIGH , NO_AUTOBIND , 40 }, // option=fine freq tuning
/* 13 */ {PROTO_DEVO , 0 , 0 , P_HIGH , NO_AUTOBIND , 0 },
/* 14 */ {PROTO_WK2x01, WK2801 , 0 , P_HIGH , NO_AUTOBIND , 0 },
#endif
arduino 編譯好了..就燒入
usbasp tools

照此網頁步驟完成fuses 更改與軟體上傳
原始 code
-config.h 要去設定 尋找 frsky xm+ 接收頻率.
若一開始就對到當然不用去找.
/** CC2500 Fine Frequency Tuning **/
//For optimal performance the CC2500 RF module used by the FrSkyD, FrSkyV, FrSkyX, SFHSS, CORONA and Hitec protocols needs to be tuned for each protocol.
//Initial tuning should be done via the radio menu with a genuine FrSky/Futaba/CORONA/Hitec receiver.
//Once a good tuning value is found it can be set here and will override the radio's 'option' setting for all existing and new models which use that protocol.
//For more information: https://github.com/pascallanger/DIY-Multiprotocol-TX-Module/tree/master/docs/Frequency_Tuning.md
//Uncomment the lines below (remove the "//") and set an appropriate value (replace the "0") to enable. Valid range is -127 to +127.
//#define FORCE_FRSKYD_TUNING 0
//#define FORCE_FRSKYV_TUNING 0
//#define FORCE_FRSKYX_TUNING 0
//#define FORCE_SFHSS_TUNING 0
//#define FORCE_CORONA_TUNING 0
//#define FORCE_HITEC_TUNING 0
---------------------------------------------------------------------------------------------------------------------
NBR_BANKS 裡面 option 就是 頻率微調的值可以從 -127~+127做設定慢慢去找到上下值
後 ( 最大+最小) / 2 就是比較好的值....
我是用 20為一個單位 設了好幾個開關再一個個對頻找出上下值. 最後填入適當的值做為標準
/* 12 */ {PROTO_FRSKYX, EU_16, 0 , P_HIGH , NO_AUTOBIND , 40 }, // option=fine freq tuning
40 是原始內建 ....我的 frsky xm+ 就是對不到...
例:
/* 1 */ {PROTO_FRSKYX, EU_16, 0 , P_HIGH , NO_AUTOBIND , 0 },
/* 2 */ {PROTO_FRSKYX, EU_16, 0 , P_HIGH , NO_AUTOBIND , 20 },
/* 3 */ {PROTO_FRSKYX, EU_16, 0 , P_HIGH , NO_AUTOBIND , 40 },
/* 3*/ {PROTO_FRSKYX, EU_16, 0 , P_HIGH , NO_AUTOBIND , 60 },
.
.
.
-----------------------------------------------------------------------------------------------------------------------
因為 我買的是atmega328 容量有限所以 要去減肥....沒用的就在前面加 "//"
直到 arduino 編譯正常就好了..
/****************/
/*** RF CHIPS ***/
/****************/
//There are 4 RF components supported. If one of them is not installed you must comment it using "//".
//If a chip is not installed all associated protocols are automatically disabled.
//4-in-1 modules have all RF chips installed
//!!!If a RF chip is present it MUST be marked as installed!!! or weird things will happen you have been warned.
//#define A7105_INSTALLED
#define CYRF6936_INSTALLED
#define CC2500_INSTALLED
#define NRF24L01_INSTALLED
/****************************/
/*** PROTOCOLS TO INCLUDE ***/
/****************************/
//In this section select the protocols you want to be accessible when using the module.
//All the protocols will not fit in the Atmega328p module so you need to pick and choose.
//Comment the protocols you are not using with "//" to save Flash space.
//The protocols below need an A7105 to be installed
//#define AFHDS2A_A7105_INO
//#define FLYSKY_A7105_INO
//#define HUBSAN_A7105_INO
//#define BUGS_A7105_INO
//The protocols below need a CYRF6936 to be installed
#define DEVO_CYRF6936_INO
#define DSM_CYRF6936_INO
#define J6PRO_CYRF6936_INO
#define WFLY_CYRF6936_INO
#define WK2x01_CYRF6936_INO
//The protocols below need a CC2500 to be installed
#define CORONA_CC2500_INO
#define FRSKYD_CC2500_INO
#define FRSKYV_CC2500_INO
#define FRSKYX_CC2500_INO
#define HITEC_CC2500_INO
#define SFHSS_CC2500_INO
//The protocols below need a NRF24L01 to be installed
//#define ASSAN_NRF24L01_INO
#define BAYANG_NRF24L01_INO
#define CABELL_NRF24L01_INO
#define CFLIE_NRF24L01_INO
#define CG023_NRF24L01_INO
#define CX10_NRF24L01_INO // Include Q2X2 protocol
#define DM002_NRF24L01_INO
#define ESKY_NRF24L01_INO
#define ESKY150_NRF24L01_INO
//#define FQ777_NRF24L01_INO
#define FY326_NRF24L01_INO
#define GW008_NRF24L01_INO
//#define HISKY_NRF24L01_INO
//#define HONTAI_NRF24L01_INO
#define H8_3D_NRF24L01_INO
#define KN_NRF24L01_INO
#define MJXQ_NRF24L01_INO
#define MT99XX_NRF24L01_INO
#define Q303_NRF24L01_INO
#define SHENQI_NRF24L01_INO
#define SLT_NRF24L01_INO
#define SYMAX_NRF24L01_INO
#define V2X2_NRF24L01_INO
#define YD717_NRF24L01_INO
-----------------------------------------------------------------------------------------------------------
這裡可以自己去設定你有用的協議 開關位置照自己意思放...
剛剛找出正確的值後填入 frskyx 的 option位置裡
例:
我的是 -40
/* 11 */ {PROTO_FRSKYX, CH_16 , 0 , P_HIGH , NO_AUTOBIND , -40 }
/** Number of PPM Channels **/
// The line below is used to set the minimum number of channels which the module should receive to consider a PPM frame valid.
// The default value is 4 to receive at least AETR for flying models but you could also connect the PPM from a car radio which has only 3 channels by changing this number to 3.
#define MIN_PPM_CHANNELS 4
// The line below is used to set the maximum number of channels which the module should work with. Any channels received above this number are discarded.
// The default value is 16 to receive all possible channels but you might want to filter some "bad" channels from the PPM frame like the ones above 6 on the Walkera PL0811.
#define MAX_PPM_CHANNELS 16
/** Rotary Switch Protocol Selector Settings **/
//The table below indicates which protocol to run when a specific position on the rotary switch has been selected.
//All fields and values are explained below. Everything is configurable from here like in the Serial mode.
//Tip: You can associate multiple times the same protocol to different rotary switch positions to take advantage of the model match based on RX_Num
//A system of banks enable the access to more protocols than positions on the rotary switch. Banks can be selected by placing the rotary switch on position 15, power up the module and
// short press the bind button multiple times until you reach the desired one. The bank number currently selected is indicated by the number of LED flash.
// Full procedure is located here: https://github.com/pascallanger/DIY-Multiprotocol-TX-Module/blob/master/Protocols_Details.md#protocol-selection-in-ppm-mode
//The parameter below indicates the number of desired banks between 1 and 5. Default is 5.
#define NBR_BANKS 5
const PPM_Parameters PPM_prot[14*NBR_BANKS]= {
#if NBR_BANKS > 0
//****************************** BANK 1 ******************************
// Switch Protocol Sub protocol RX_Num Power Auto Bind Option
/* 1 */ {PROTO_FLYSKY, Flysky , 0 , P_HIGH , NO_AUTOBIND , 0 },
/* 2 */ {PROTO_AFHDS2A, PWM_IBUS , 0 , P_HIGH , NO_AUTOBIND , 0 }, // RX number 0
/* 3 */ {PROTO_AFHDS2A, PWM_IBUS , 1 , P_HIGH , NO_AUTOBIND , 0 }, // RX number 1
/* 4 */ {PROTO_AFHDS2A, PWM_IBUS , 2 , P_HIGH , NO_AUTOBIND , 0 }, // RX number 2
/* 5 */ {PROTO_AFHDS2A, PWM_IBUS , 3 , P_HIGH , NO_AUTOBIND , 0 }, // RX number 3
/* 6 */ {PROTO_AFHDS2A, PWM_IBUS , 2 , P_HIGH , NO_AUTOBIND , 0 }, // RX number 4
/* 7 */ {PROTO_AFHDS2A, PWM_IBUS , 3 , P_HIGH , NO_AUTOBIND , 0 }, // RX number 5
/* 8 */ {PROTO_SFHSS, H107 , 0 , P_HIGH , NO_AUTOBIND , 0 },
/* 9 */ {PROTO_FRSKYV, 0 , 0 , P_HIGH , NO_AUTOBIND , 40 }, // option=fine freq tuning
/* 10 */ {PROTO_FRSKYD, 0 , 0 , P_HIGH , NO_AUTOBIND , 40 }, // option=fine freq tuning
/* 11 */ {PROTO_FRSKYX, CH_16 , 0 , P_HIGH , NO_AUTOBIND , -40 }, // option=fine freq tuning
/* 12 */ {PROTO_FRSKYX, EU_16 , 0 , P_HIGH , NO_AUTOBIND , 40 }, // option=fine freq tuning
/* 13 */ {PROTO_DEVO , 0 , 0 , P_HIGH , NO_AUTOBIND , 0 },
/* 14 */ {PROTO_WK2x01, WK2801 , 0 , P_HIGH , NO_AUTOBIND , 0 },
#endif
arduino 編譯好了..就燒入
把披薩包裝紙盒 回收 diy 三角翼飛機
剛剛看到 Flite test 上傳 新的 diy 三角翼飛機 用披薩包裝紙盒回收來做,超厲害的,給我衝動想diy 來玩........
diy 過程
飛行 測試


資料來源 Flite test
小愛同學& 小愛同學mini 帶到戶外測試.....還不錯.
小愛同學mini 帶到戶外測試.
其實是賣家說車上很好用,實測真的好用方便,講一下它就幫你找歌.
配合app 還有歌詞.....
小愛同學 音效好速度快 wifi 5G

小愛同學mini 音效較差低音不好,找歌下載速度慢一點 wifi 2.4G
方便好帶,行動電源可以搞定..


Diy B03 小四軸 Tinyx7
Tinux6 前一些時間再學校操場狂飆了好多電池,超級好飛又快,飛一趟都
4:10左右,還撞了一次籃框..沒壞哈哈 .....爽字一個. 唯有一次風大逆風剛好
玩一半電被吹偏..

Tinyx6 B03 比較小,再組一台 Tinyx7 來飛飛看看是否比較抗風.

改電池接線....

刷軟體.......哈哈

Tinyx7 馬達是 820的....大顆

跟Tinyx6比

完工....在家試飛 2:30 ....耗電....
訂閱:
文章 (Atom)
Gogoro 社區店體驗 #gogoro
Gogoro 社區店保養體驗還不錯,不用再跑到原廠比較遠的 Gogoro 保養店。 直接隨到隨服務,跟原廠保養一樣,只差在他保養你看的到,你有問題直接問直接回答。 我的資費是免費保養的也可以直接保養,一樣免費。 此店老闆…店長…都是吧…蠻專業的,原廠技師出來開的。昨天介紹...

-
 之前做了一個大的OPENTX arduino-mega2560-open-tx 因為想要一台小的所以看到OPENAVRC 可以使用 0.96" OLED所以可以小型 化方便攜帶,所以展開DIY製作. 參考資料...... 法國討論網站 RC...
 -
 Gogoro 2 plus 牽車及行車記錄器DIY安裝 話說女兒,寒假前回家在散步聊天之時突然開口說想買機車,在一陣討論了解下做父母的無法一時答應,原因大家應該都會一樣擔...
